Unbreaking a bike with code
After wanting one for many years, I finally pulled the trigger and bought a 3D printer as a birthday gift to myself. And it’s been a blast! I’ve printed everything I’ve gotten my hands on, but I have had this nagging feeling that I was just replicating, I wasn’t creating.
One (un)lucky day though, my son broke the chain guard on is bike. I jumped on the chance to prove myself and took some quick notes and measurements. (Then I took a photo of it because paper always magically disappears for me.)
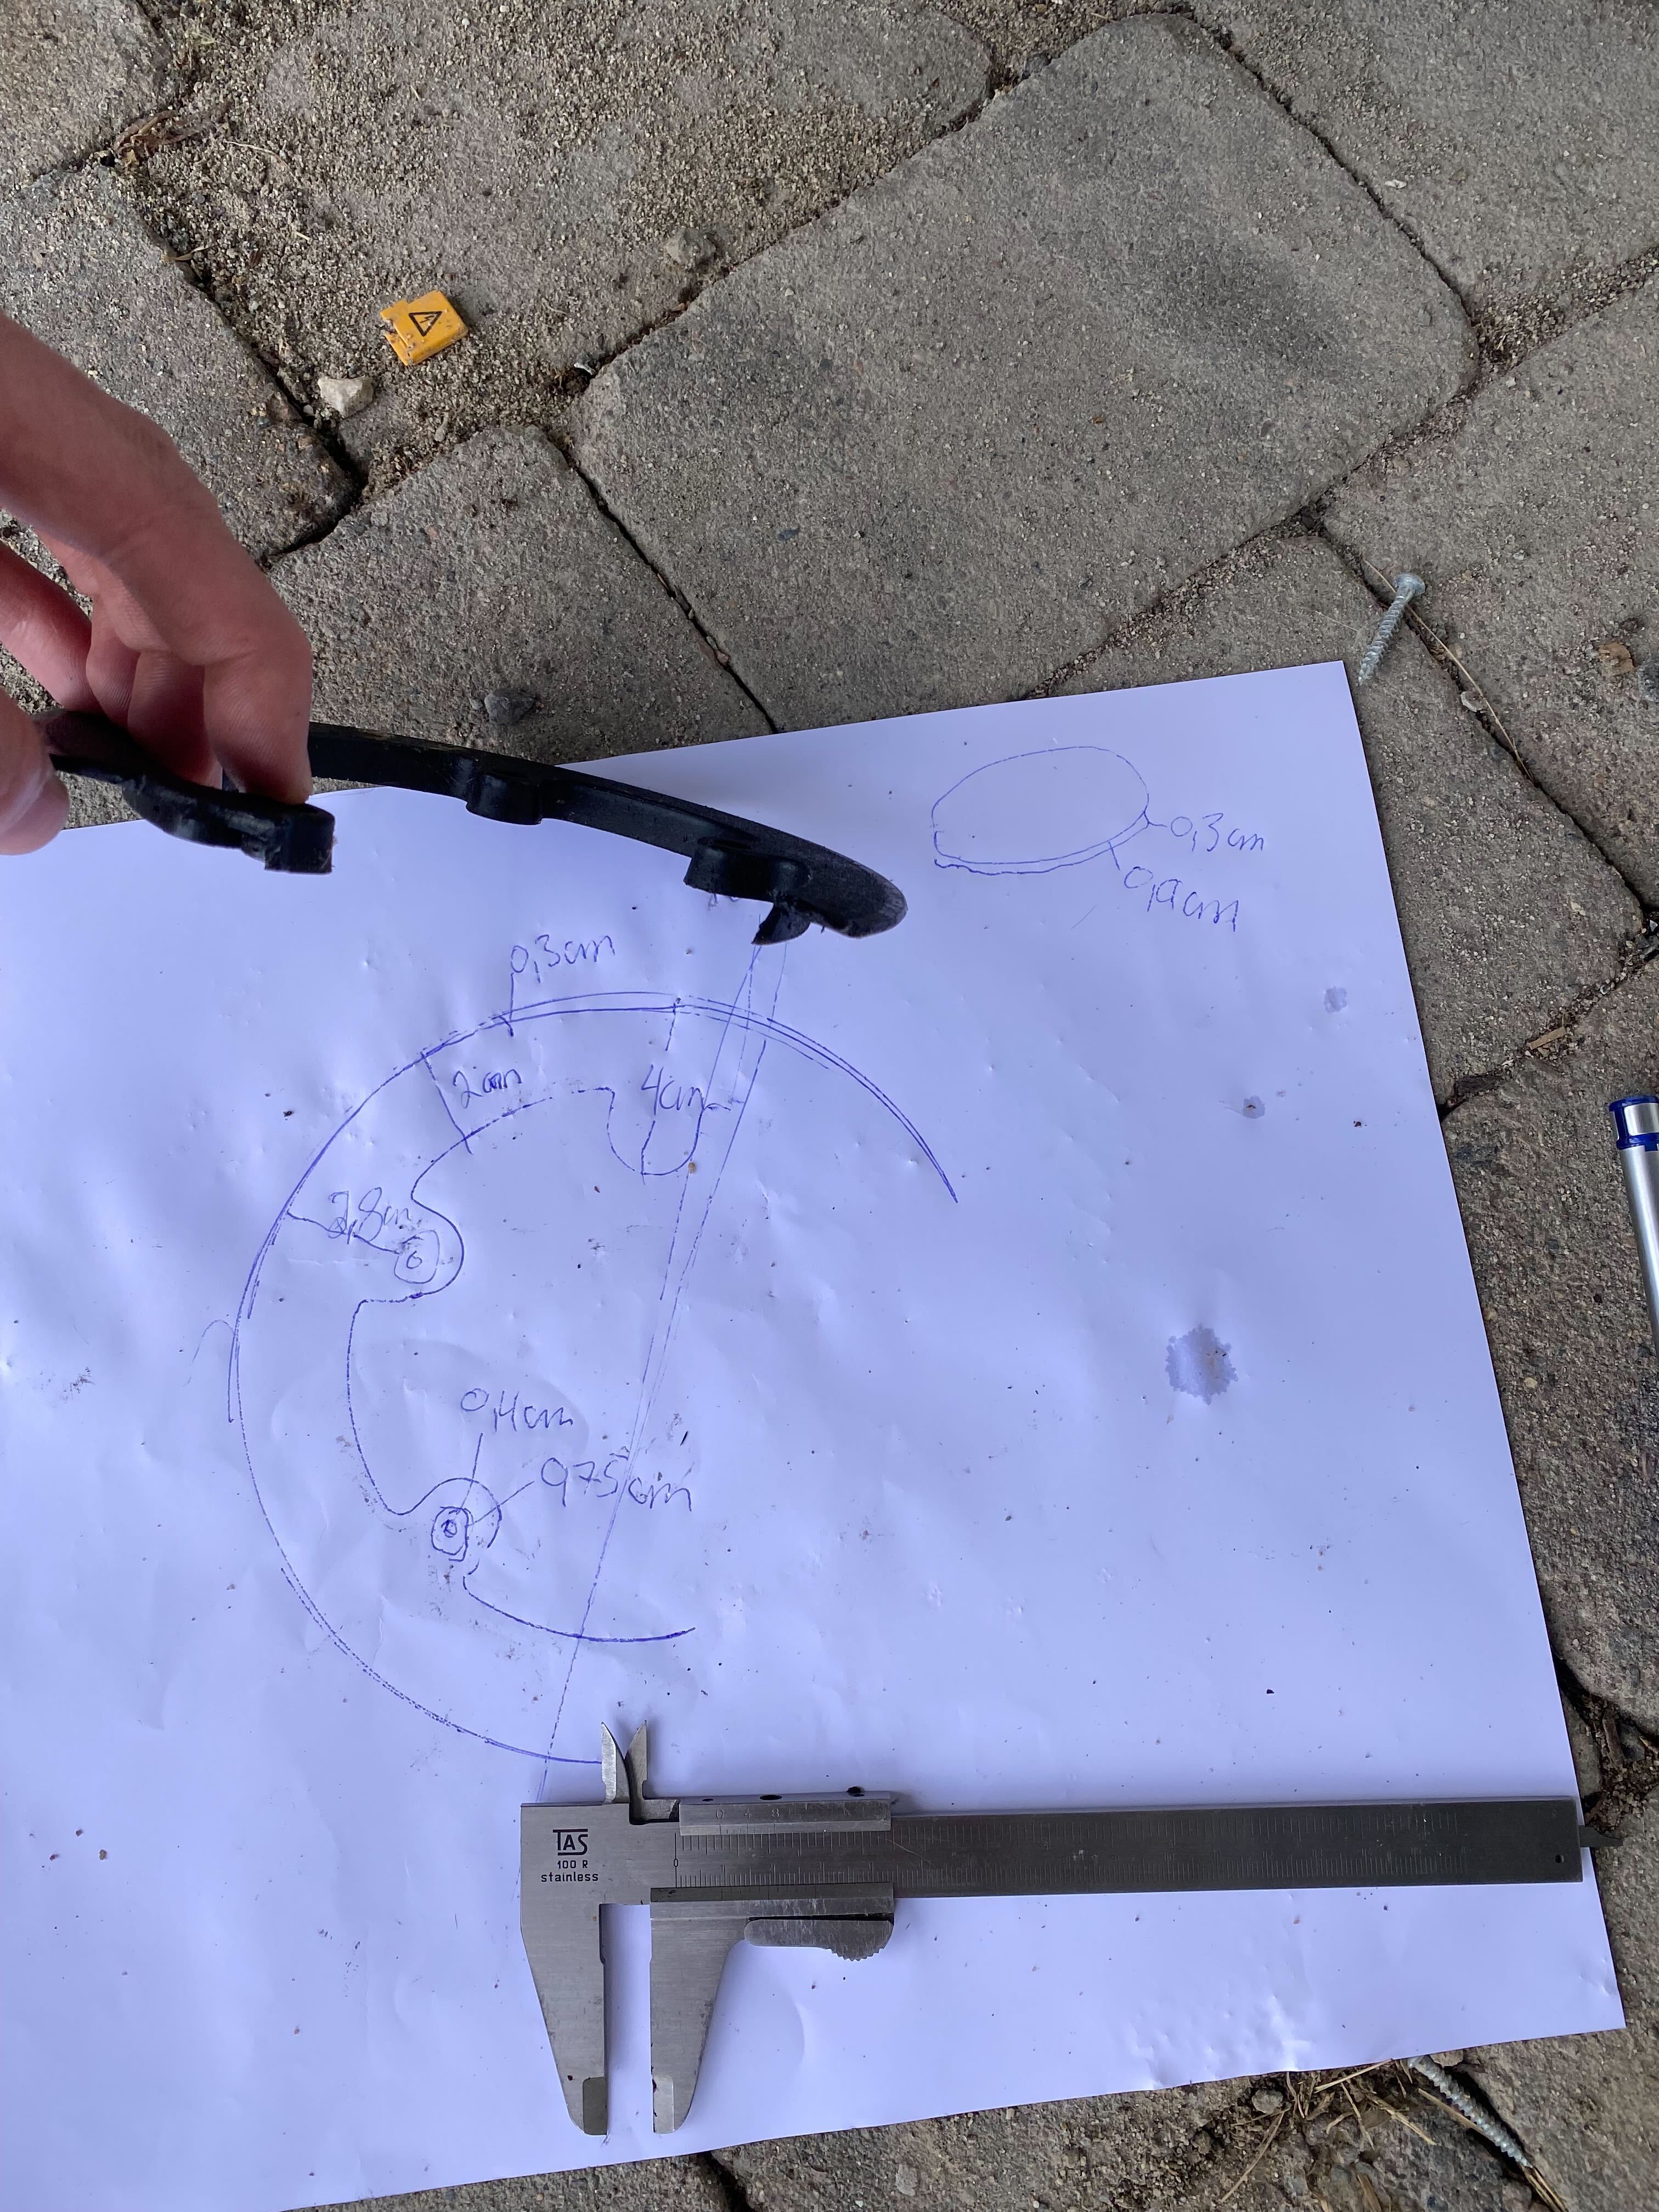
With all the measurements ready I started researching CAD (computer-aided design) tools, to figure out which one would be best to use for this. As it turned out, I hated all of them. They all look pretty slick and have a gazillion features, but the learning curve was steep and there was so much lingo I didn’t understand. I’ve never really liked graphical tools anyway to be honest. The mouse is cumbersome to use and the menus are always a nightmare to navigate. Eventually though I stumbled upon JSCAD. A piece of software that let’s me write JavaScript that renders a 3d model. Perfect! :D
With some fairly simple code, I could render a cylinder.
const jscad = require('@jscad/modeling')
const { cylinder } = jscad.primitives
const mainCircleRadius = 82.5
const mainCircleThickness = 3

function main () {
  return cylinder({
    radius: mainCircleRadius,
    height: mainCircleThickness,
    center: [0,0,mainCircleThickness/2],
    segments: 64
  })
}

module.exports = { main }
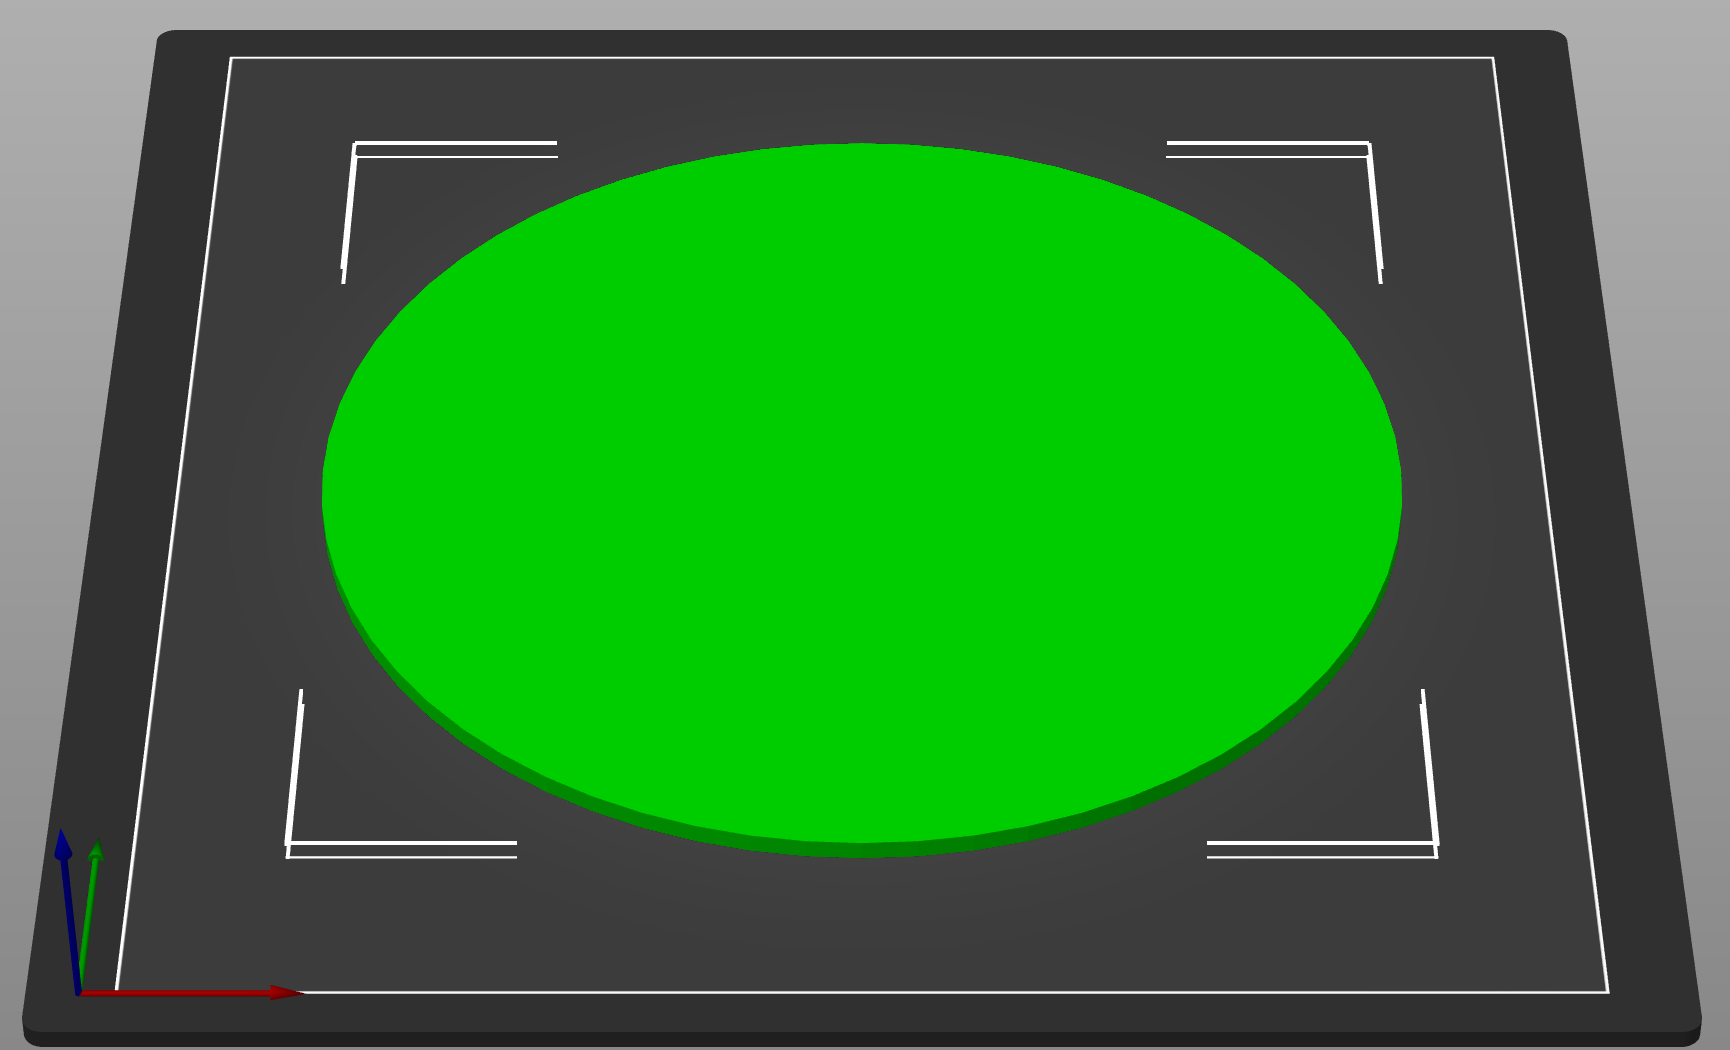
So I’m creating a cylinder with my specified radius and height, and I’m defining the center position of the object to be x=0 and y=0, so in the center. But I’m putting it up half it’s height in the z axis, so the model will lay on z height 0. This makes it easier to place things in relation to eachother later. The segments parameter defines how many straight segments should be used to make up the circle. With segments set to 5, we would get a pentagon, with 64 instead we get a fairly smooth circle.
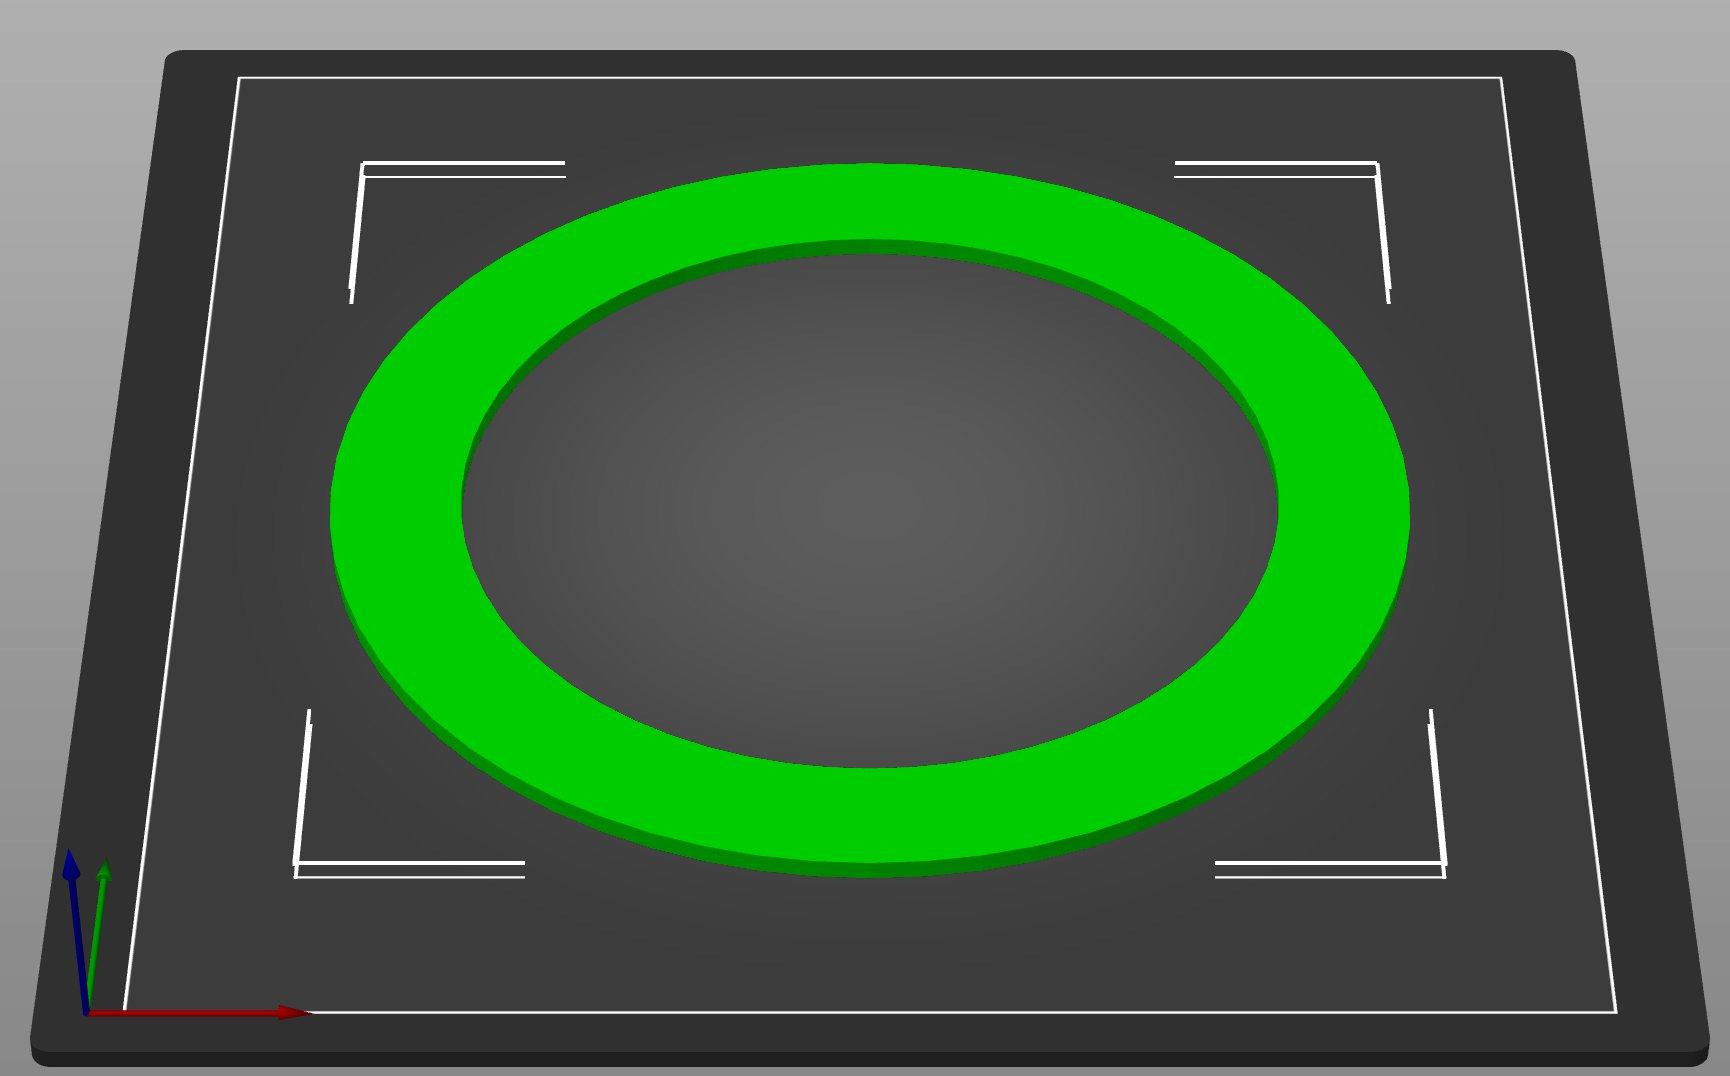
What I actually wanted though was a nice flat circle with a width of 2 cm, so the next step was to create a hole in the cylinder.
const { subtract } = jscad.booleans
const mainCircleRadius = 82.5
const mainCircleWidth = 20
const mainCircleThickness = 3

function generateMainCircle() {
  const mainCircleOuter = cylinder({
    radius: mainCircleRadius,
    height: mainCircleThickness,
    center: [0,0,mainCircleThickness/2],
    segments: 64
  })
  const mainCircleInner = cylinder({
    radius: mainCircleRadius - mainCircleWidth,
    height: mainCircleThickness,
    center: [0,0,mainCircleThickness/2],
    segments: 64
  })

  return subtract(mainCircleOuter, mainCircleInner)
}
I imported the subtract function, added some variables and pulled this into it’s own little function. One big cylinder as before, and a slightly smaller cylinder and then I simply subtracted the small one from the big one. Behold the hole!
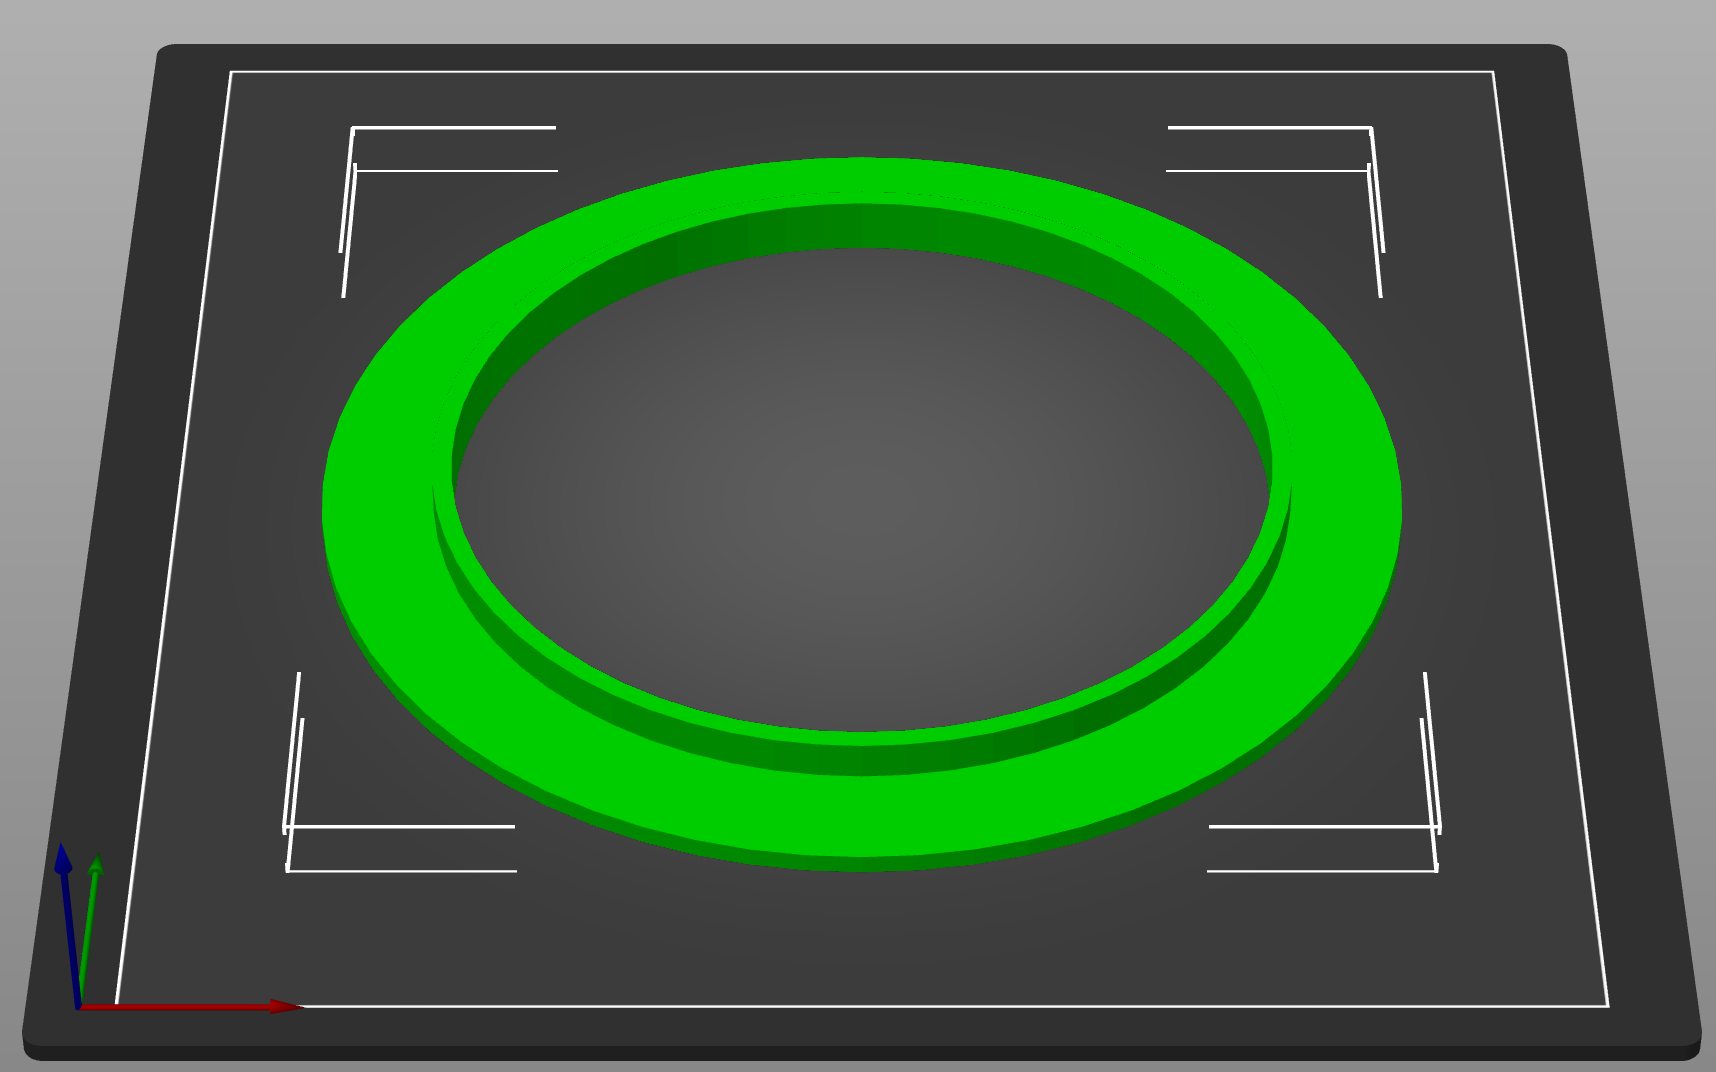
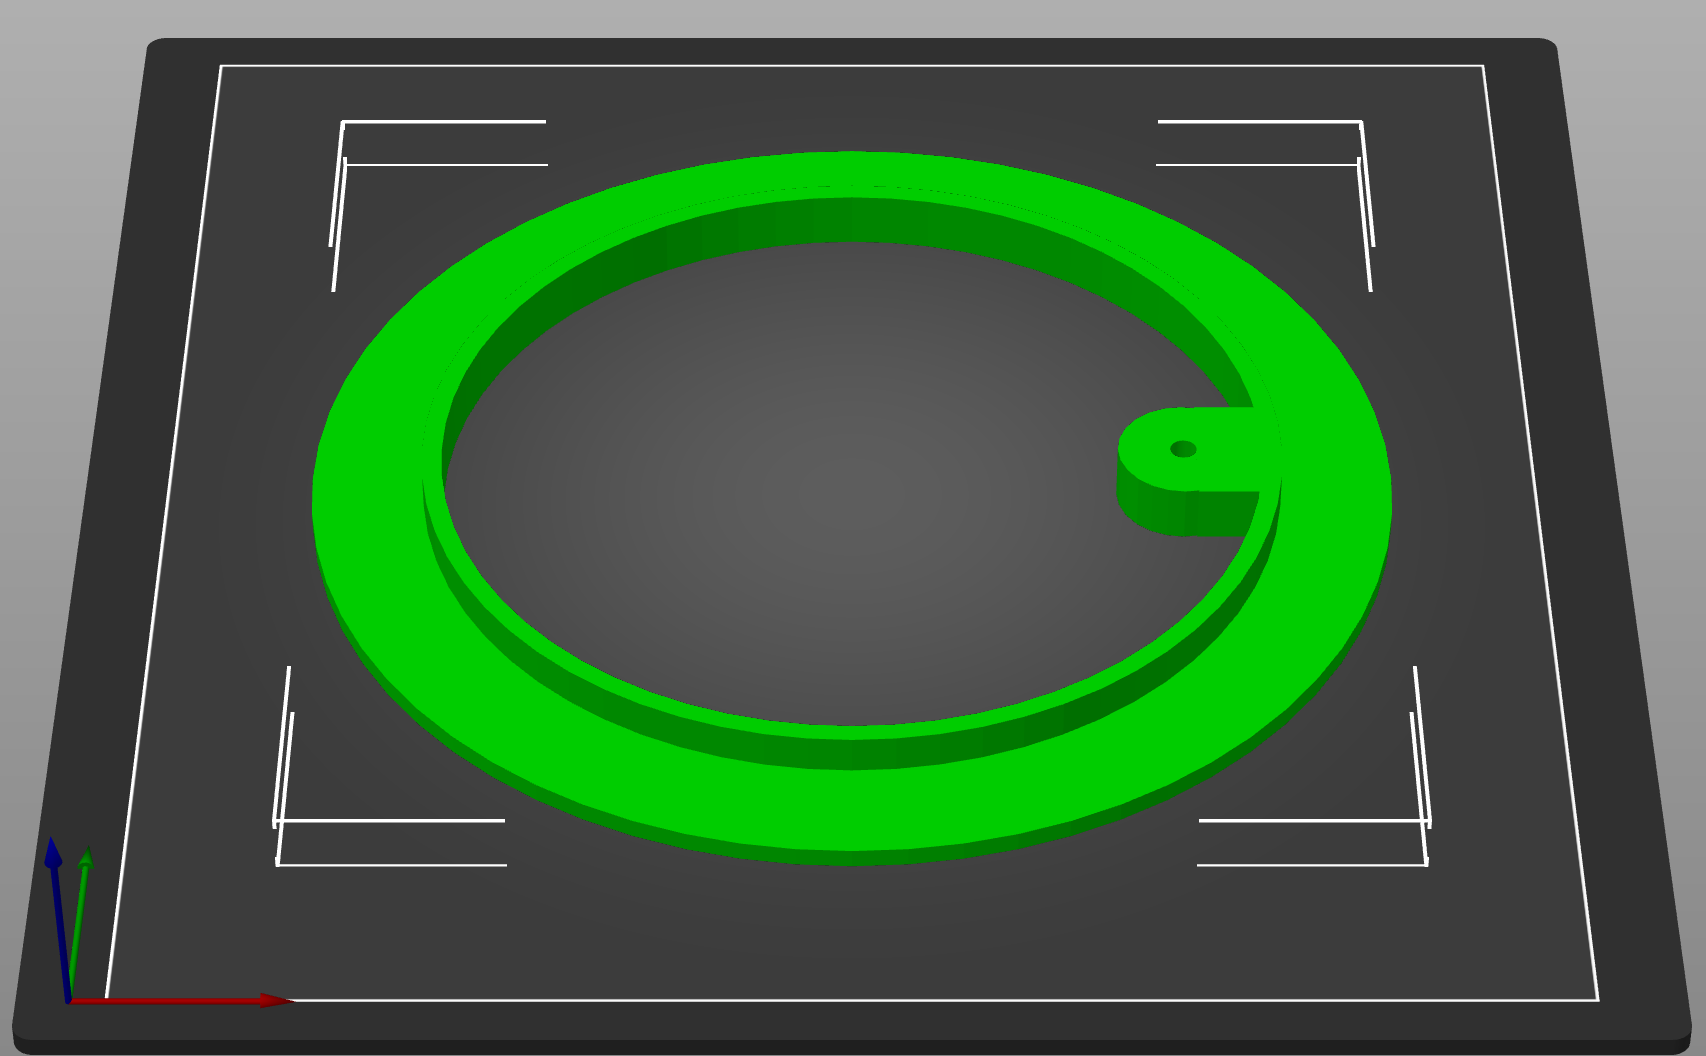
Next I created yet another circle and attached it to the first to make an L shaped rim. Basically this L thing is what keeps the chain in place.
const { union } = jscad.booleans

const rimWidth = 3
const rimThickness = 9
const rimRadius = mainCircleRadius - mainCircleWidth + rimWidth

function generateRim() {
  const rimOuter = cylinder({
    radius: rimRadius,
    height: rimThickness,
    center: [0,0,rimThickness/2],
    segments: 64
  })
  const rimInner = cylinder({
    radius: rimRadius - rimWidth,
    height: rimThickness,
    center: [0,0,rimThickness/2],
    segments: 64
  })

  return subtract(rimOuter, rimInner)
}

function main (){
  const mainCircle = generateMainCircle()
  const rim = generateRim()

  return union(mainCircle, rim)
}
Now there is a rim, but this thing needs to be attached to the cog of the chain somehow. Enter the tooth, and it’s “nut hole”. I seriously had no idea what to call this, but you get the point I hope.
const toothCount = 5
const toothRadius = 10
const toothConnectorLength = 10
const toothThickness = 9
const toothConnectorPositionX = (mainCircleRadius - mainCircleWidth) - (toothRadius / 2 )
const toothPositionX = toothConnectorPositionX - (toothConnectorLength / 2) - 2

const nutClearingRadius = 3.75
const nutRadius = 2

function generateTooth() {
  const toothCircle = cylinder({
    radius: toothRadius,
    height: toothThickness,
    center: [toothPositionX,0,toothThickness/2],
    segments: 24
  })
  const toothConnector = cuboid({
    size: [toothConnectorLength,
    toothRadius * 2, toothThickness],
    center: [toothConnectorPositionX,0,toothThickness/2]
  })

  const toothNutClearingHole = cylinder({
    radius: nutClearingRadius,
    height: toothThickness/2,
    center: [toothPositionX,0,toothThickness/4],
    segments: 12
  })
  const toothNutHole = cylinder({
    radius: nutRadius,
    height: toothThickness-2,
    center: [toothPositionX,0,toothThickness - (toothThickness/4)],
    segments: 64
  })

  const tooth = union(toothCircle, toothConnector)
  const nut = union(toothNutClearingHole, toothNutHole)

  return subtract(tooth, nut)
}

function main (){
  const mainCircle = generateMainCircle()
  const rim = generateRim()

  const tooth = generateTooth()

  const single_tooth_chain_guard = union(union(mainCircle, rim), tooth)

  return single_tooth_chain_guard
}
This basically just adds another function which generates a “toothCircle” where we place the “nut hole” or screw hole I guess would be a better name and the toothNutClearingHole which is where the head of the screw should fit. To get a good attachment to the rest of the design I added a cuboid to the circle which would then fit onto the main body of the chain guard.
Now I just had to copy that tooth out to 4 other spots on the chain guard, which was surprisingly simple.
function main (){
  const mainCircle = generateMainCircle()
  const rim = generateRim()

  const tooth = generateTooth()

  const single_tooth_chain_guard = union(union(mainCircle, rim), tooth)

  const toothAngle = degToRad(360/toothCount)

  var full_chain_guard = single_tooth_chain_guard

  for (let i = 0; i < toothCount; i++) {
    const rotated_chain_guard = rotateZ(toothAngle, full_chain_guard)
    full_chain_guard = union(full_chain_guard, rotated_chain_guard)
  }

  return full_chain_guard

}
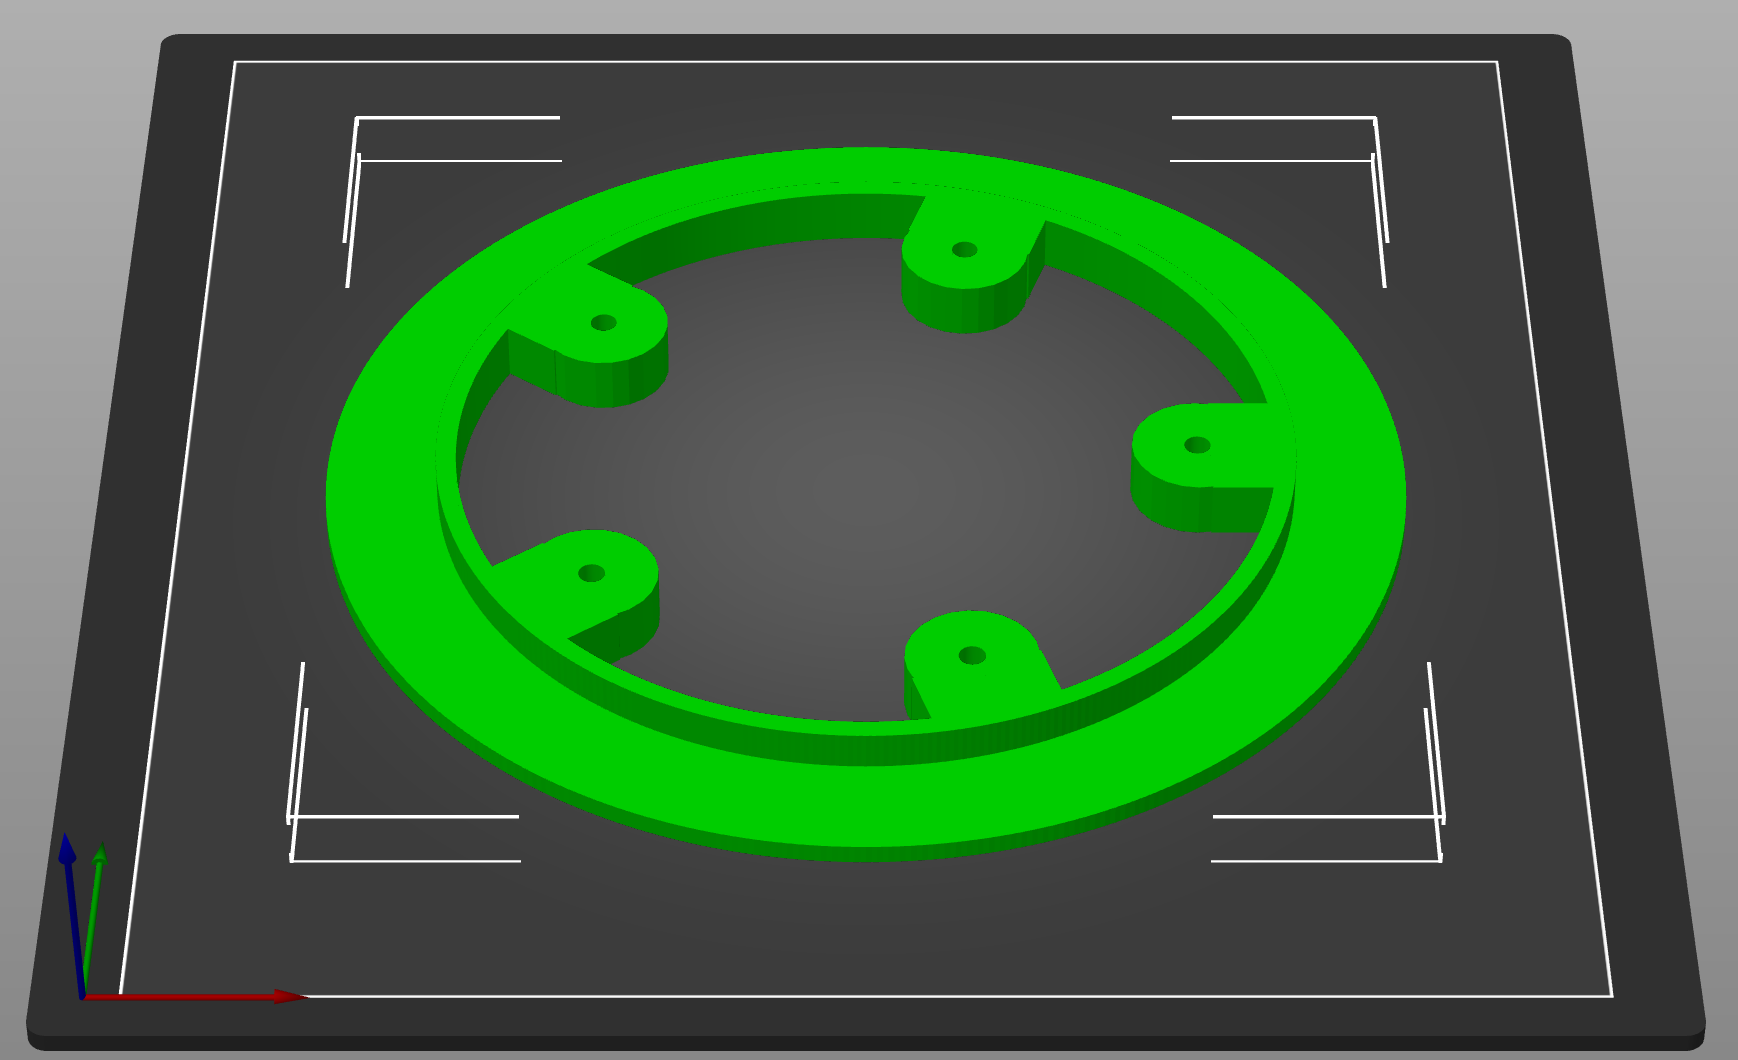
The for loop rotates our chain guard and adds another tooth for each iteration, until we finally have all 5 of them. Well technically it it adds an entire single tooth chain guard, but since the main body of the chain guard overlaps between the two models, only an extra tooth is effectively added.
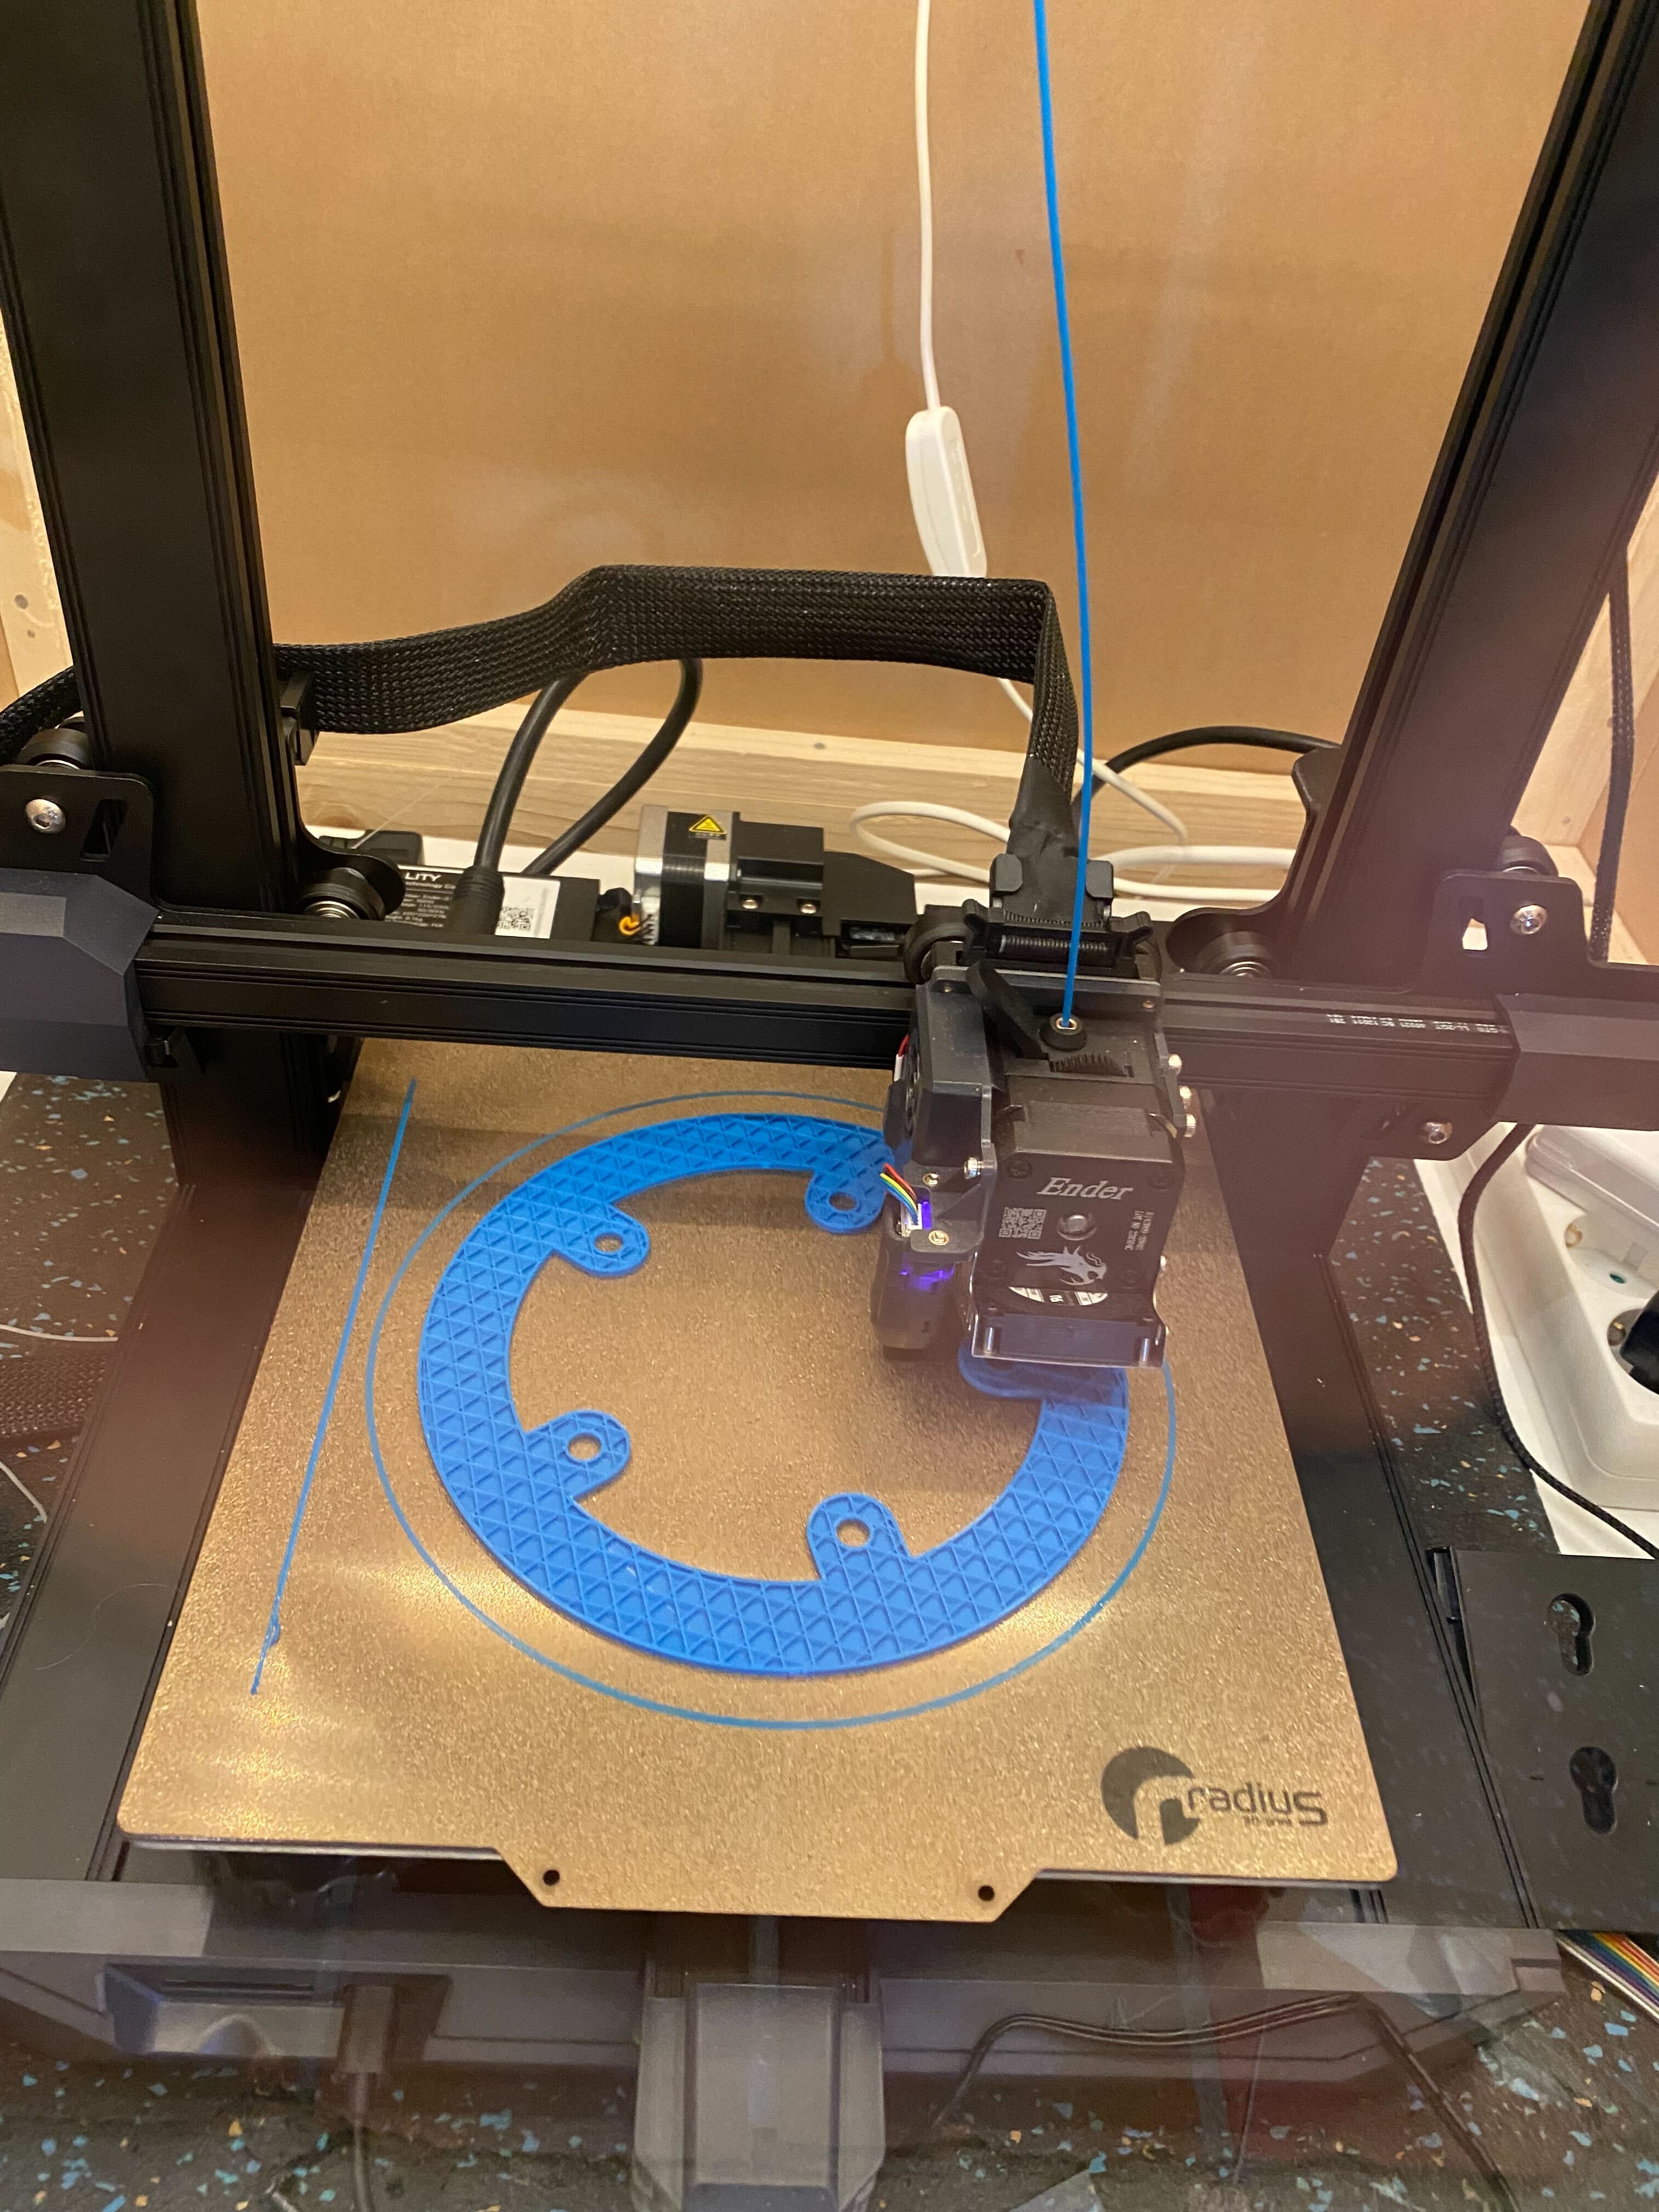
Now it’s just a matter of preparing the model for my printer, and fire it up!
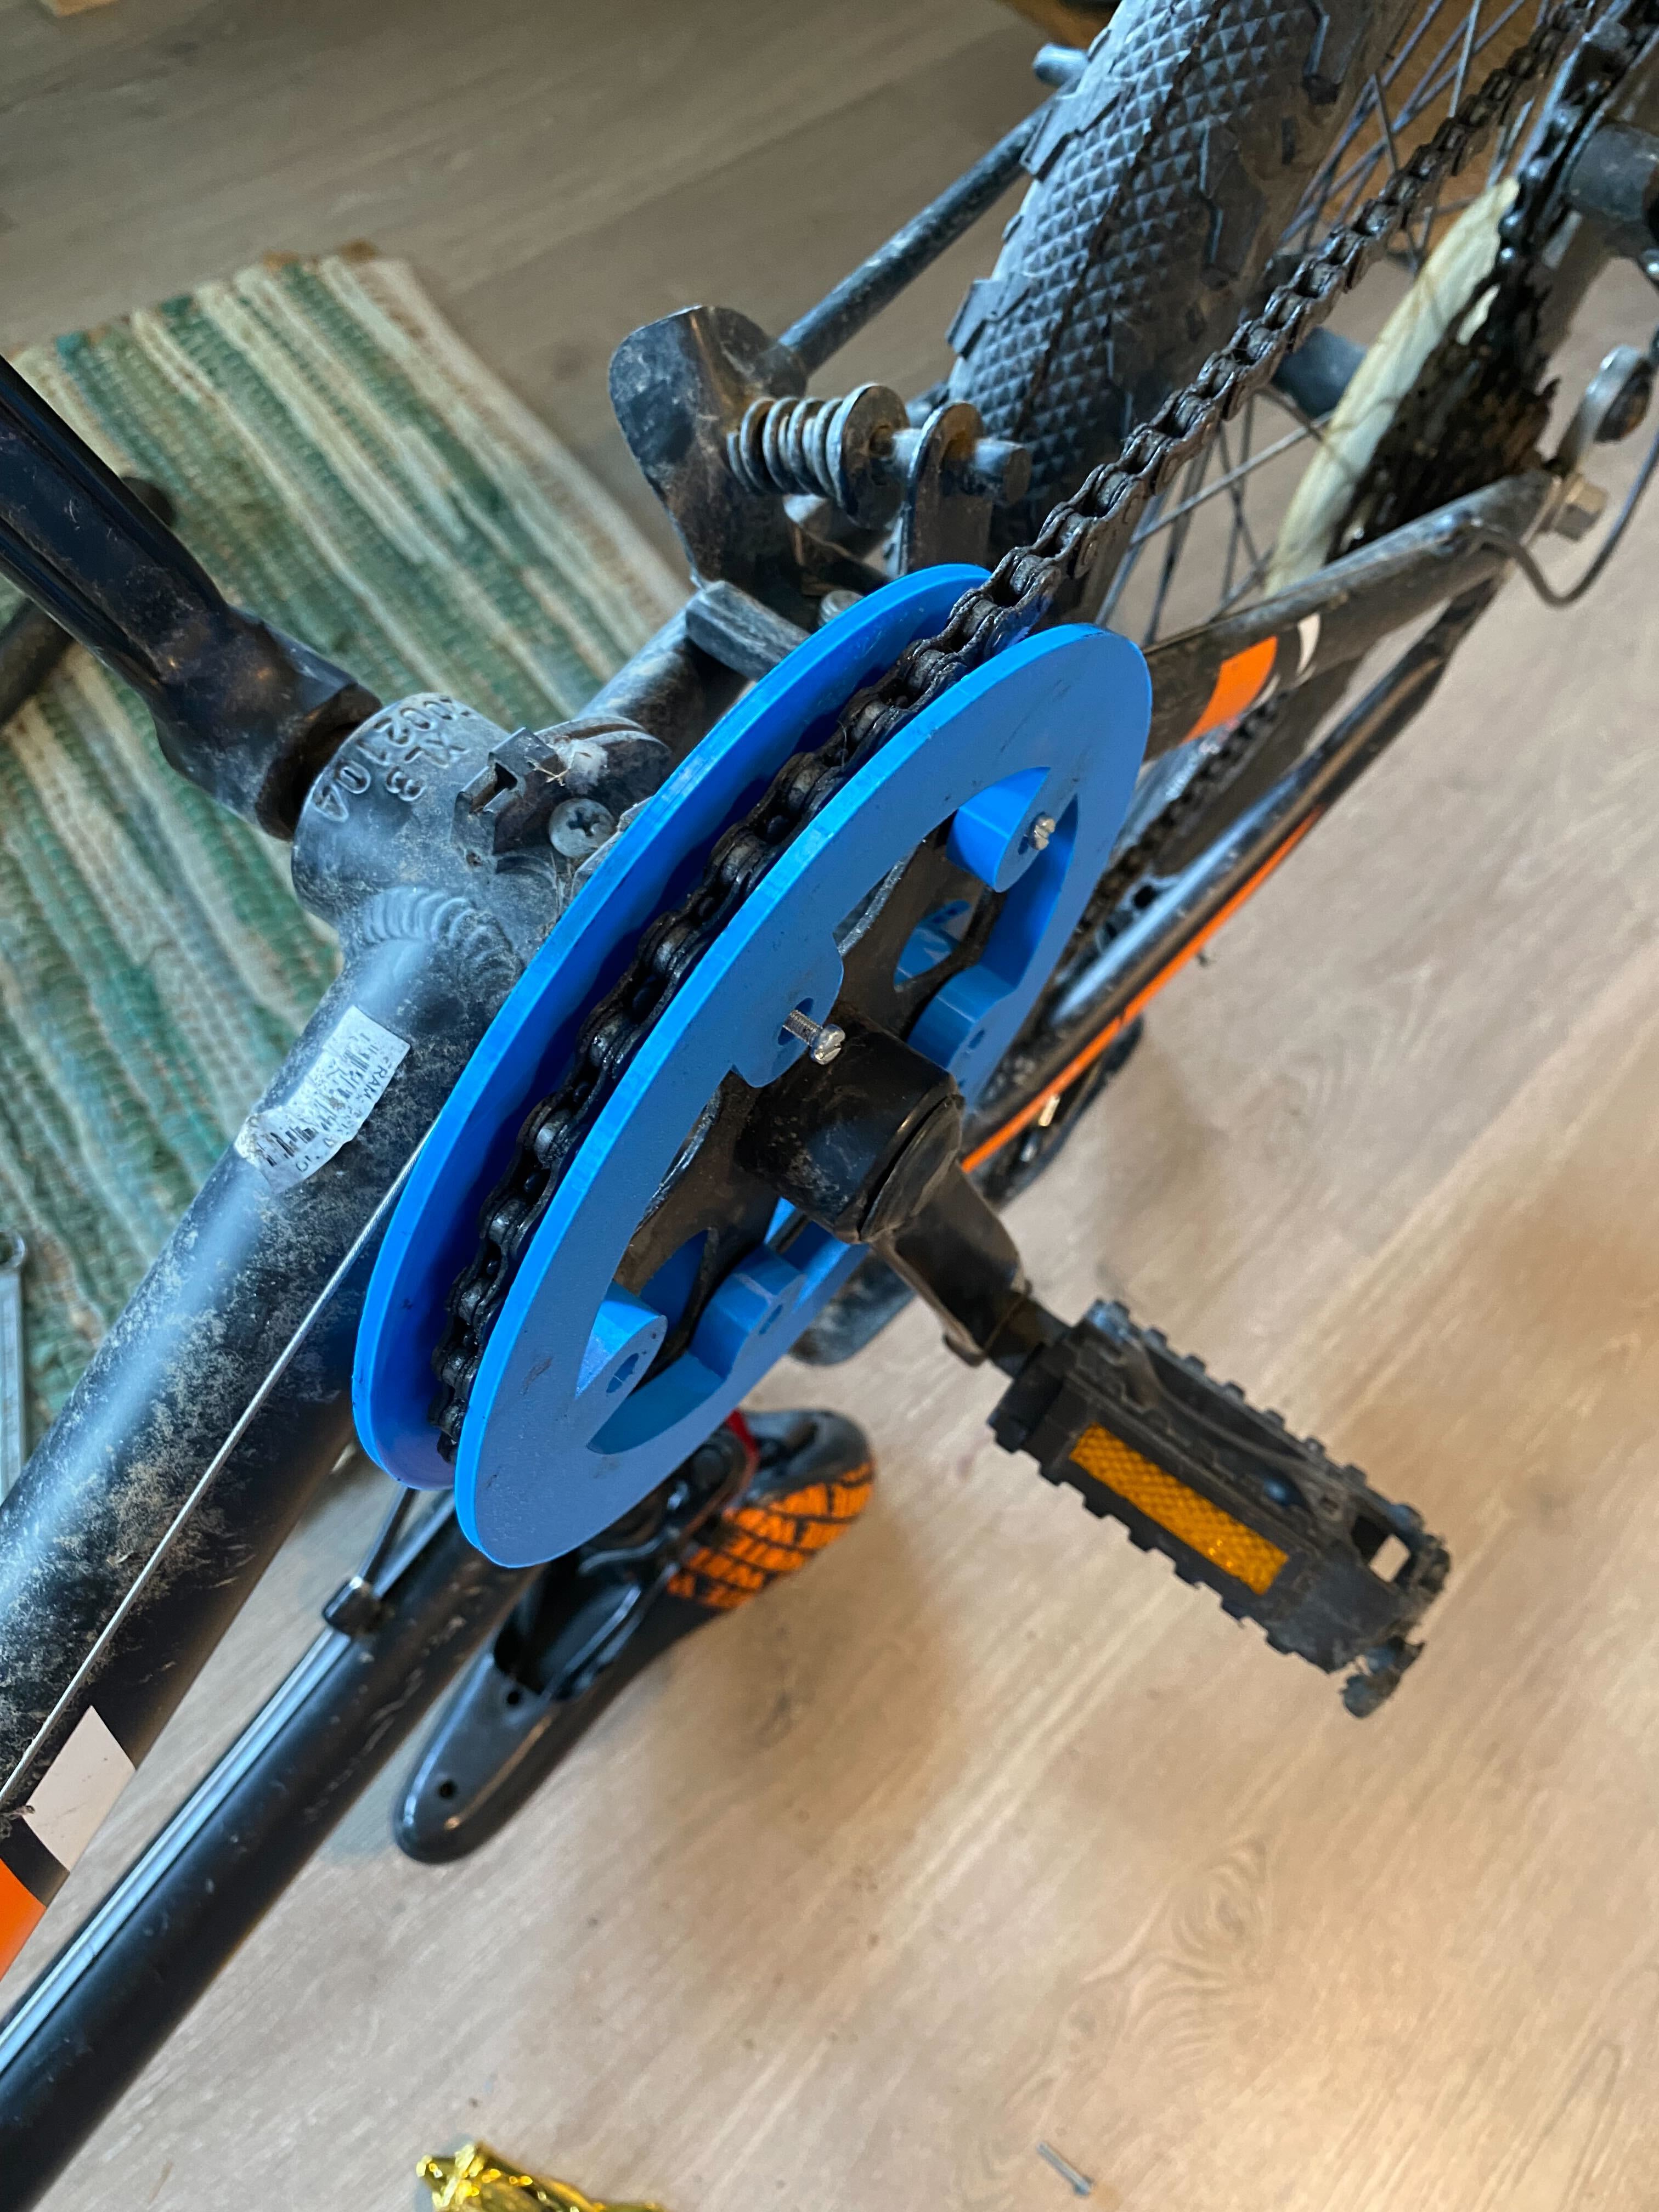
Once it was done I printed another one for the backside and I could finally attach it. Or at least I’m in the process of doing that in the below photo.
This was actually much easier and more fun than I had feared. You can view my JavaScript code in all it’s beauty here and Github also supports viewing STLs in the browser so you could also play with the finished model over here
I’ll probably make an updated version of this model though to add hexagonal “nutClearingHoles” on the side where I attached the bolts. This way the bolts will stick without me having to hold them in place while screwing in the screws. Another thing is that I printed this in PLA which is quite brittle, and a next print will probably be done in PETG which is much tougher. And finally, I’ll want to add some luminescent or reflective markings or letters for dramatic effect :D